Drop down in oaf
Drop down in oaf is uses when we want to Create the List of Value in the OAF Page as POP List/Drop down Style. POP list style means , We will show the List of value as a List of Item. Message Lov choice and Message Lov input both are the beans of the OAF Page which uses to create the List of Value in the OAF Page but both have the Different Style to show the List of Value in the OAF Page. Message lov choice is shows the data in the list item but the message lov input bean shows the list of value in the Different region of the OAF page. Here below I am sharing the steps to Drop down in OAF.
Steps to create drop down in oaf
1.Create a new workspace name "RohitPopList".
Right Click on "Applications".Click on "NewOAWorkspace".
Right Click on "Applications".Click on "NewOAWorkspace".

Enter the name of Workspace="RohitPopList".Click Ok.

Project wizard will open as below click next.

Enter the name of the Project="RohitPopList".
Default Package= "rohit.oracle.apps.fnd.RohitPopList"
Package determines the directory where the java class files and other files related to this project strored.
In this directory oracle.apps.fnd must be required."fnd" is the oracle application shortname you can use other applications like "ak" in this.

Enter the RunTime connection details as below.Enter the E-business Suit Application User Name and Password.(already explained in the JDev installation).
Workspace and project has been created.
To create a "PopList" we need to creata a View Object(VO).My PopList will show the supplier list So that my view object is based on vendor master table.
Create a View Object(VO).
Right Click on the project "RohitPopList".Click New
Click on View Object and then OK.

Enter the View Object name="SupplierListVO"
Defualt Package="rohit.oracle.apps.fnd.RohitPopList.server"
we create "View Object" under the "Server" directory of the project as OAF Standard.

Click next next and go to step 5 "SQL Statement".

Click Next and the Finish.View Object(VO) has created as below.

Now we create a OAF Page as below
Right Click on the Project "RohitPopList".Click New.
Click on the Page.Click on ok Button

Enter the Page Name="RohitPopListPG"
Default Package="rohit.oracle.apps.fnd.RohitPopList.webui"
we create the page under the webui under the project directory
Click Ok Page has been created.
Default Package="rohit.oracle.apps.fnd.RohitPopList.webui"
we create the page under the webui under the project directory
Click Ok Page has been created.

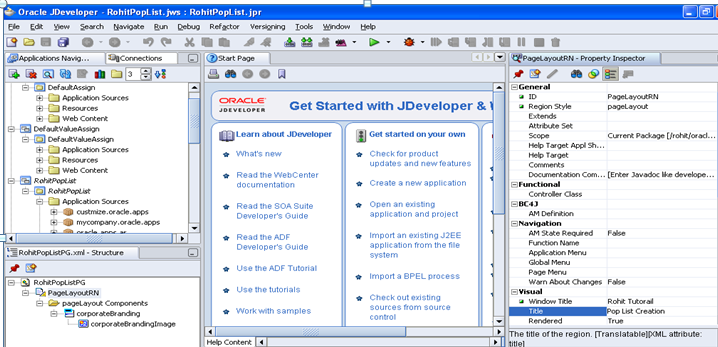
When you click the "RohitPopListPG" Below structure pane has dispayed as below
Repalce the name of the "region1" with "PageLayoutRN" in the property inspector.

Click on the "PageLayoutRN".On the right hand side In the property inspector we will set the AM for the this page
Click on the "PageLayoutRN".On the right hand side In the property inspector we will set the AM for the this page
But we have not created the Application Module for this Page so the next step is to create the Application Module so that we can attach this with the RohitPopListPG Page.
Right Click on the project "RohitPopList".Click New
Select Application Module and then Click Ok.
Right Click on the project "RohitPopList".Click New
Select Application Module and then Click Ok.

Application Module wizard has open as below click next
Enter the Application Module name="RohitPopListAM"
Defualt Package="rohit.oracle.apps.fnd.RohitPopList.server"
we create "Application module" under the "Server" directory of the project as OAF Standard.
Click next and then finish.

Now our application module has been creted.Our next step is to attach the view object with the "Application Module" .Click on "EditRohitPopListAM".
Then the below screen has opened.
Select the SupplierListVO in the left hand side and then shuttle this to the right and then click next and then finish.

Now we attach the Application Module(AM) with the page so click on the "PageLayoutRN" in the structure. Go to the right hand side then attach the AM as below


Right Click on the "PageLayoutRN" and then new and then click region.

Then region2 has created.
Replace the region2 name with "MainRN" in the proeprty Inspector.

Right Click "MainRN".Click New and then Click Item.

Item1 has created under the "MainRN"Region.Click on "MainRN". Go the property window in right hand side and then change ItemStyle=messagechoice
itemStyle=messagechoice.
itemStyle=messagechoice.

Set the Prompt=Supplier in the Property Window.
Now we attach the View Object "SupplierListVO" with this item1.
Set the Below Property for the Item1.
Under Data in the Property Window
PickList View Definition=rohit.oracle.apps.fnd.RohitPopList.server.SupplierListVO.
PickList Display Attribute=Vendorname.
PickList Value Attribute=VendorId.

After this rebuild your project like below.Right Click on the Project "RohitPopList" and then click "Rebuild".
After Compilation Right click on the project "RohitPopList" and then click run.
Output Of the Above Project .


1 comments:
Hi,
Now can you tell me that how would you handle the event, when we select any value from the drop down?
Post a Comment