How to Create Dashboards in Oracle Fusion
Hi Friends, in this post we will discuss about otbi dashboard.We will learn how we can create Dashboards in Oracle Fusion in this post. We can run multiple reports from the dashboard itself. We can create a Dashboard to our Important Work or Activity which help us to do Monitoring kind of Jobs and help us to make more request discussion making capabilities. We all know that we can represent the Data in Graphical form through OTBI , but if you can see this graphical and analysis data directly through Dashboards.
Here below you will find dashboard examples.
Dashboard is the Combination of Multiple Reporting options in a single screen and we can see multiple reports in a single screen through Dashboards. I will show how we can create Dashboards in Fusion.
Oracle Dashboard
examples:-
Step1: I will create First OTBI report and then I will run this report from this new created Dashboard.
Step 2:-
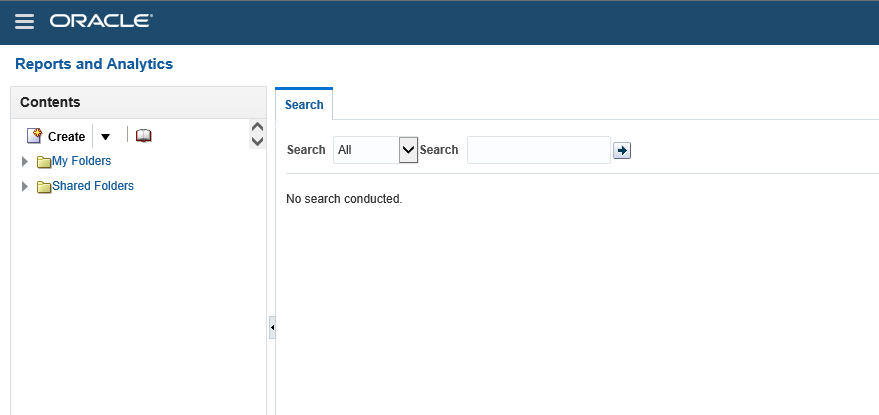
Go to Oracle fusion Application and Then go to Navigator. Select Report and analytics.
Step2:-
This below will appear after the Reports and Analytics as below.
My Folders
My Folders' is your own folder. It means it is specific to each user. when you will create your report under this folder then no one in the application can see and access these reports because these are saved and created under your My folder. so this is totally yours personal Development.
Shared Folders
Shared Folders is your Application common Folder. It means it is shared across users of the application as per the roles. Shared folders has many Sub-folders related to the Work related and Module Related.
Step3:-
Click on browse Catalog as below.
Step4:-
Now click on the Home Icon as below and this will navigate to Home Screen.
Step5:-
Now click on Analysis as below.
Step6:-
In this example I am going to Create Analysis on Supplier Invoices for that I will select Payables Invoices Subject Area.
Step7:-
This is the Development window of OTBI reports.
Selected columns:
'Selected columns' represents Columns which you want to include in your Report output.
Filters:
Filters represents where conditions in this OTBI report.
You will drop the Columns from the subject areas in the left side.
You can see in the left side subject area and the sub folders. Each subfolders has information related to AP invoices. Like Accounting folder have accounting information. Invoice Details folder has Invoice number , invoice description kind of information.
Step8:- I have Drag Invoice Number and Invoice Amount ,Supplier and Supplier site from Subject area to the Selected Columns as below.
Then these are the Four columns will come in this report output.
Step8:- Now Click on the Supplier Column and Select filter Option.
Step9:- Create Supplier column as a Filter type Prompted. It means that Supplier Name will be prompted or work as parameter.
Step10:-Now Click on the Supplier Column and Select filter Option.
Step11:-Create Supplier Site column as a Filter type Prompted. It means that Supplier Site will be prompted or work as parameter
Dashboard prompt presentation Variable
Step12:- We can see below these two filters created as prompted.
Step13:- Save the report under this below path.
Report Path:- /Shared Folders/Custom/Financials
Report Name:- XX_SUPLIER_INVOICE
Step14:- Creating Dashboard Prompts
Now for Creating Dashboard we will first create Dashboard Prompts
We are creating Dashboard Prompt for our OTBI report Parameters or we can say OTBI Report prompted parameters in Filter condition.
Go to New ==> Dashboard Prompt
Step15:- In Dashboard Prompts , we will select the same subject area as we selected in OTIB report.
Step16:- Click on + sign and select Column prompt option as below.
Step17:- Select the same columns as a Dashboard Prompts which we selected as a column in OTBI reports.
Step17:-User Input should be Choice List , if you want to give LOV option to User.
For Supplier
For Supplier Site:-
User Input should be Choice List , if you want to give LOV option to User.
Limit Values by should be your Supplier(First) parameter because site will be dependent on supplier Parameter.
You will find the rest of the steps in the Second part of this post in this below url
Part2:-
How to Create Dashboards in Oracle Fusion


4 comments:
Oracle Fusion HCM Online Training
Oracle Fusion SCM Online Training
Oracle Fusion Financials Online Training
oracle fusion financials classroom training
Oracle Fusion HCM Training in Hyderabad
Good Blog Thanks for Sharing This informative article. It would be helpful to all
Oracle Fusion HCM Online Training
Nice Article, Thanks For Sharing This Information.
Oracle Fusion HCM Online Training
Where is part 2 bro
Post a Comment