Showing posts with label FBDI. Show all posts

Thursday, 8 February 2018

Part1 : Customer Import in Oracle Fusion Through FBDI


Part1 :Customer Import in Oracle Fusion Through FBDI


Hi Friends, in this post ,we will try to Import Customers in Oracle Fusion Through FBDI.

This Topic is split in two parts. This is the first Part.

Part1:- https://rpforacle.blogspot.in/2018/02/customer-import-in-oracle-fusion-through-fbdi.html

Part2:- https://rpforacle.blogspot.in/2018/02/part2-customer-import-in-oracle-fusion-through-fbdi.html


Step1:- Go to Oracle Repository to Download FBDI Data Templates


Step2:- Download the Customer Data Template as below.


Step3:- Go to Oracle Fusion responsibility and go to Data Import Roles.

 
Step4:- Now click on 'Create Data Import Batch ' as below


if you found this post helpful and you liked it then follow this blog to get notifications for the upcoming posts.

Step5:- Enter the Batch Details as below.

Step6:- When you will save the Data Import batch then it will create Batch Id as below.

You have to copy this Batch id and put this Batch id Customer Data Template for All Records.
 By that way this batch will identify the records to be imported through Data Template.


Step7:- Now Copy that Batch id Data Template as below.


Step8:- Now click the ZIP file as below.


Step9:- This is the ZIP File Created.


 Got to the second part to see the rest of the steps

Part2:- https://rpforacle.blogspot.in/2018/02/part2-customer-import-in-oracle-fusion-through-fbdi.html

Oracle Fusion FBDI : AR Auto Invoice Import


Oracle Fusion FBDI : AR Auto Invoice Import


Hi Friends , in this post We will try to Import AR Invoices in Oracle Fusion Through FBDI.

Step1:- Go to Oracle Repository to Download FBDI Data Templates


Step2:- Enter the Data in Data Template. Please be sure , your Transaction Batch Source Name should be created in the System


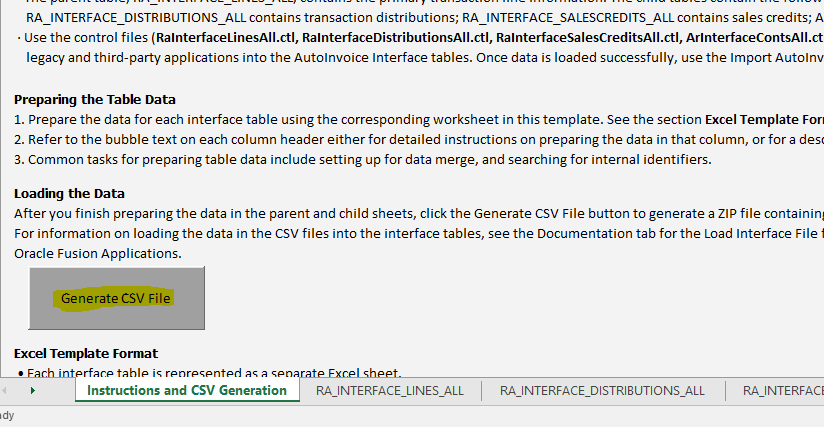
Step3:- Then click on the First tab of This Data Template and Click on 'Generate CSV File'


Step4:- This is the Zip file created from this Data Template.


Step5:- Go to Oracle Fusion and Then go to Navigator and Click on File Import and Export.


Step6:- Then Upload the ZIP file here below and select the UCM Account.


Step7:- Then go to Navigator again and click on Scheduled Processes.


Step8:- Then Run the Load Interface File Import as below.


Enter Parameters for this Program.
 
 
Step9:- Then Again click on Scheduled New Processes as below and run the second program.


Step10 :- Run the Second ESS job Import auto Invoice.

 
Enter the Job Parameters and Select the BU and Source Accordingly as per the sheet.


Contact us for any Collaboration, Project Support & On Job Support Work

Name

Email *

Message *